Translate

Showing posts with label crafting. Show all posts

Monday, September 10, 2012

Wedding Reception Preparation Continues - Making Rhinestone Bouquets


Love this little hand dyed bird- done for me by a talented lady in Atlanta

A trophy filled with old buttons, rhinestone pins, mesh roses and vintage velvet millinery leaves.


The old silver basket on the left was my moms

 
Until yesterday, I was still searching for the unique and creative  accents for the upcoming wedding reception.  I have seen a lot of "brooch bouquets" made of old vintage pins and buttons on different wedding blogs lately.  However, yesterday at Grayslake, I found my inspiration piece- an old tarnished silver coffee pot filled with a "brooch bouquet".  I purchased it from a very talented artist who's real business is making these incredible bracelets and she uses the leftover bits of jewelry to create these "whimseys".  So I purchased one and when home to work on it.  I removed the elements that didn't work with our party decor and re-created the little rhinestone bouquet using different leaves and adding in a stellar vintage rhinestone pin. Then I was on a roll- went out to the craft room, unearthed my rhinestone treasures and got busy making 4 more of these unique little treasures.  My favorite is the tall basket that was my moms.  I used some of her old rhinestone pins in it. ( I think these will be great for the holidays too! They will be perfect for powder rooms - small and sparkley)  So I think I'll make more for the store for our Christmas open house.) I wish the photos did these justice  - but they don't pick up the sparkle and depth of each piece.
Then I had an idea and called the girls- how about everyone contribute an old piece of rhinestone jewelry from their jewelry boxes and we will make a special "whimsey" for Amy using all of our combined contributions.  Tomorrow, I will start gathering the pieces from each of the girls and begin to create a special bouquet for Amy. can't wait to see how it turns out!

Saturday, August 11, 2012

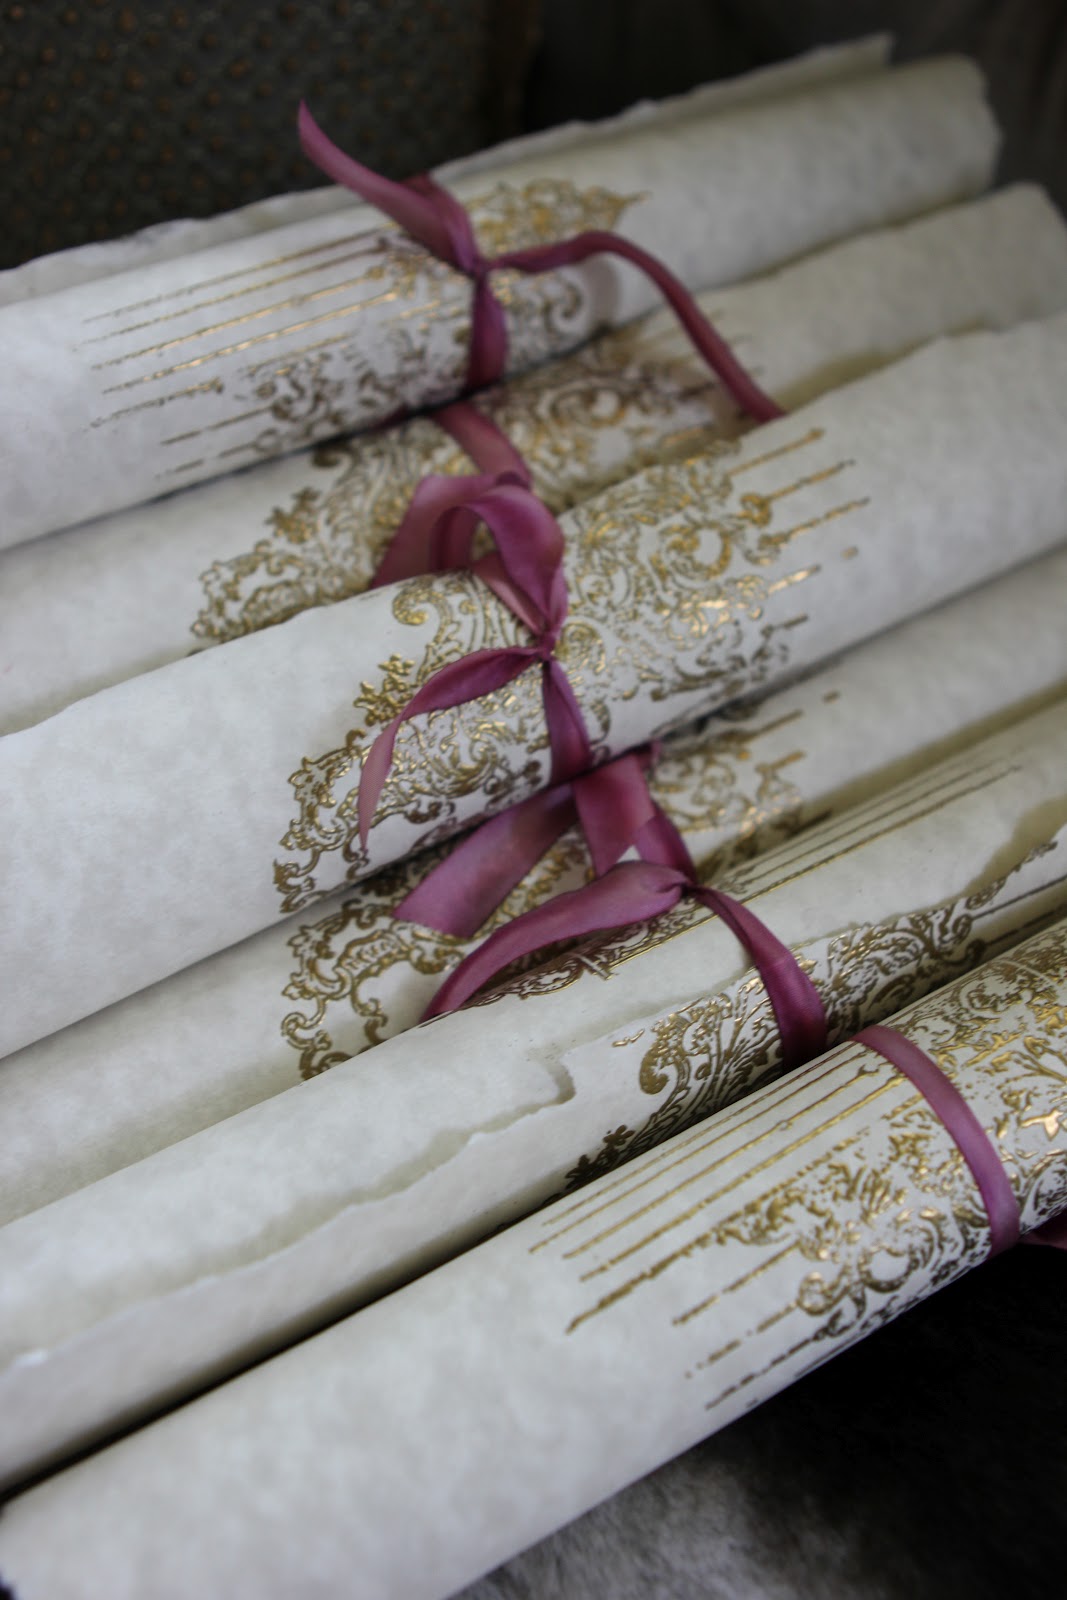
Wedding Invitation in a Tube


Tyed with hand dyed pink ribbon.

Stamped and embossed Crest Stamp embellished with rhinestone.

Rhinestone embellishment purchased from Hobby Lobby

Mailing tube used to mail the embellished tube and invitation


Amy, one of our Romancing the Home girls, surprised us by deciding to get married on the beach in Florida a couple of month's ago.  With little notice and  no time to prepare, we decided to have the wedding reception later this fall at my house.  The invitations have just been mailed and were a labor of love for her.  We first started with a 2inch by 12 inch mailing tube that we purchased on line from PaperMart.  A French letter was the background design to which we added "once upon a time" in red letters in Photoshop.  ( I cannot remember where I found this letter, but the Graphics Fairy is a great place to get copies of French letters ) Copying this to parchment paper, next we stamped and embossed a gold crest to the front of the letter. we glued the sheets to the tube and finished the tops and bottoms with velvet hand dyed ribbon.  We embellished the crest  with a rhinestone.  The final touch to the tube was adding a rhinestone embellishment that we purchased at Hobby Lobby.   The actual invitation was created on parchment paper using Chopin Script ( a free download from DaFont.com).   We hand tore the edges, sprayed it with a glimmer mist from a scrap booking supply store, and embellished the crest with a rhinestone. The back edge was stamped and embossed with a garden gate stamp and then tied with hand dyed ribbon. It was then inserted into the embellished tube and sealed with gold painted end caps.  To mail the invitations, we had to use a slightly bigger tube (3 by 15).  We stamped it with the "love gives us a fairytale" stamp and filled the tube with crinkled filling of gold and cream paper shreds  and the invitation.   Surprising enough, it was less than $3.00 to mail each of this over sized invites.   Now it's time to start planning the menu and details! Stay tuned!

Monday, December 5, 2011

Beauty and the Beast- The Angel and the Lion


One of our best customers asked me to embellish a very pretty angel that we sold at the store. She wanted it to go from pretty to gorgeous! She had also purchased an antique lion toy during our Christmas Open House that she wanted me to decorate as a Christmas display for her husband's office ( who just happens to be a Leo!) Yesterday afternoon, I finally had the time to get out my trusty glue gun and my stash of embellishments. The angel acquired feather and rhinestone wings, a crushed velvet wrap and a crown. The crown was made by gluing a metallic braid to a curtain ring and adding the front detail from an old dress. Rhinestones were inset into the bodice, along with a beautiful pin and ribbon at the base.

Leo, the lion, got a new saddle for Christmas, made from a zebra fabric scrap, metallic fringe and more decorative details from an old dress. He also was crowned for the season! A Mark Roberts animal inspired Santa will ride him through the Holiday Season.

Monday, July 27, 2009

Little Collected Trinkets Finally get a Purpose


Since I have been going to flea markets most of my adult life, I have accumulated quite a collection of old trims, flowers, jewelry, buttons and just interesting trinkets. It's Sunday morning and I am in the mood to do something creative - my husband is fishing, the kids are gone, the classical music is on and the screen doors are open to let in the summer breezes. I spread out the treasures and organize them by color and plug in the glue gun! Using old collars as the base, I assemble the pieces into little collected works of art. They look beautiful on a pillow, pinned to a lampshade, or just around the lovely statuesque lady.